Welcome to TeamDirectory, a Microsoft 365 application that helps your organization turn Microsoft Entra ID data into a searchable, structured employee directory.
This guide walks you through getting started with TeamDirectory, including installation, Microsoft 365 integration, search, categories, filters, administrator management, and data integrity checks.
Key features of TeamDirectory
Simple setup
Build your directory in minutes with single sign-on and data from Microsoft Entra ID. No technical skills are required.
Smart categories
Organize your directory around your unique structure using flexible, logic-based categories built from your data fields.
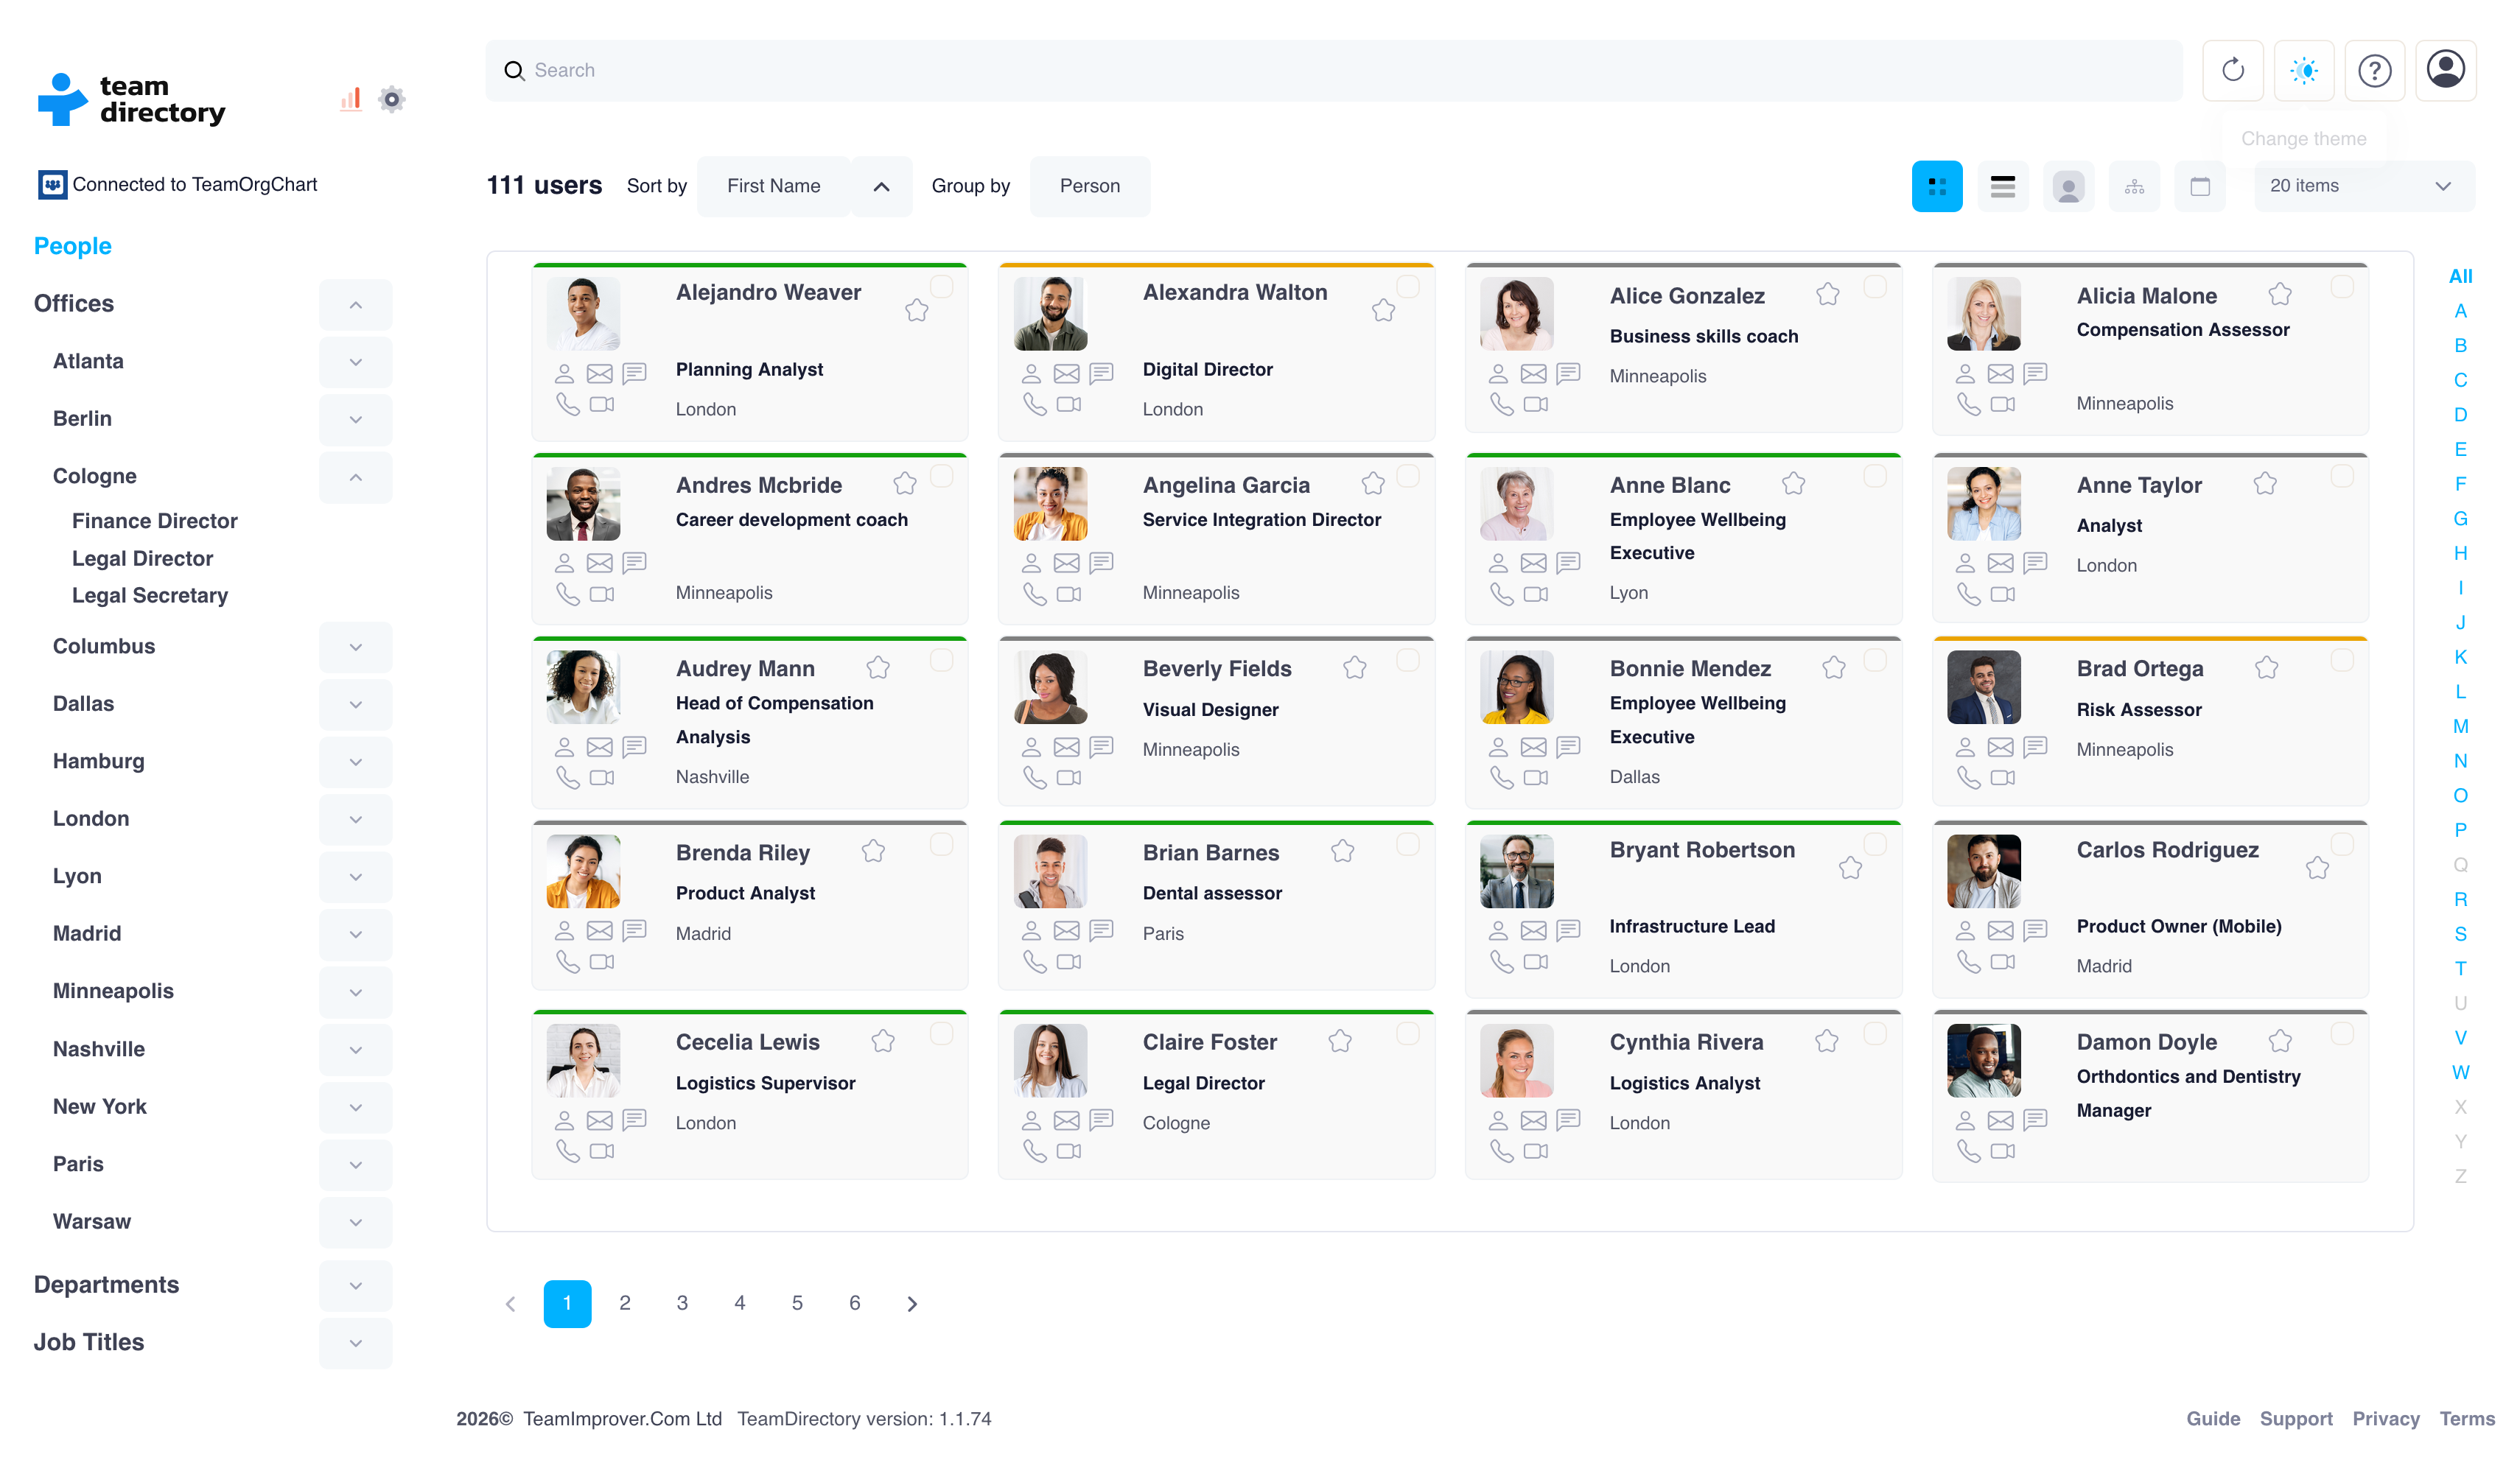
Profile, org chart, and table views
Explore your directory in the format that works best for you, including profile cards, table views, and an integrated org chart that maps hierarchy, reporting lines, and team structure.
Integration
Fit TeamDirectory seamlessly into your Microsoft 365 workflow and access your directory where you already work, without switching apps.
Trust and security
TeamDirectory stores only the metadata required to display and configure your directory, such as categories, filters, and display settings. This metadata does not include personal employee information.
Start a free trial
We offer a fully featured 30-day free trial with no credit card required and no usage limitations.
If you need more time to evaluate TeamDirectory, please get in touch and we’ll be happy to discuss extending your trial.
Purchasing TeamDirectory
Our simple pricing structure is based on your organization's size.
All plans include full functionality and support.
Small organizations, up to 200 employees
$25 USD monthly
$200 USD annually
Medium-sized organizations, up to 750 employees
$60 USD monthly
$500 USD annually
Large organizations, over 750 employees
$140 USD monthly
$1200 USD annually
Your subscription enables us to consistently support and enhance TeamDirectory, dedicating more time to development and innovation so you continuously benefit from improvements and new features.
Help and support
For more information on using TeamDirectory and specific use cases, explore our comprehensive user guides.
If you have any questions or need further support, get in touch with our dedicated support team.
Installation and integration
TeamDirectory is accessible directly in your web browser, Microsoft Teams, or Microsoft SharePoint, and is available for download from Microsoft AppSource.
It works consistently across all platforms, so regardless of where you install it or how you sign up, the end result should be the same.
Authentication
TeamDirectory supports authentication through Microsoft Entra ID, formerly Azure Active Directory, and uses Single Sign-On. Users are authenticated with corporate credentials managed through Microsoft 365.
TeamDirectory in your browser
Simply sign in to access TeamDirectory in your web browser.
All major browsers are supported.
Installing TeamDirectory in Microsoft Teams
Pin TeamDirectory to your app bar or add it to a team channel for immediate access to your employee directory, bringing the full functionality of the web application into Microsoft Teams.
There are two ways to install TeamDirectory in Microsoft Teams.
From Microsoft AppSource
Install from Microsoft AppSource to add TeamDirectory to a Microsoft Teams channel.
From within Microsoft Teams
- Navigate to the Apps section on the left sidebar of the Teams interface.
- Search for and select TeamDirectory.
- On the app description page, click the Add button. The app will then begin installing in your Microsoft Teams environment.
- Once installed, you can find TeamDirectory in the left sidebar.
- To keep TeamDirectory accessible at all times, right-click the app icon and select Pin.
Adding TeamDirectory to Microsoft SharePoint
TeamDirectory includes an SPFx web part that can be deployed to your SharePoint sites and provides both web part and full-page web part components.
You can install it from Microsoft AppSource.
Permissions and consent
TeamDirectory works on the principle of minimal consent. You only need to provide consent for the permissions required by the functionality you wish to use.
The first time you sign in, you may be asked to provide consent for the permissions required by the features you want to use.
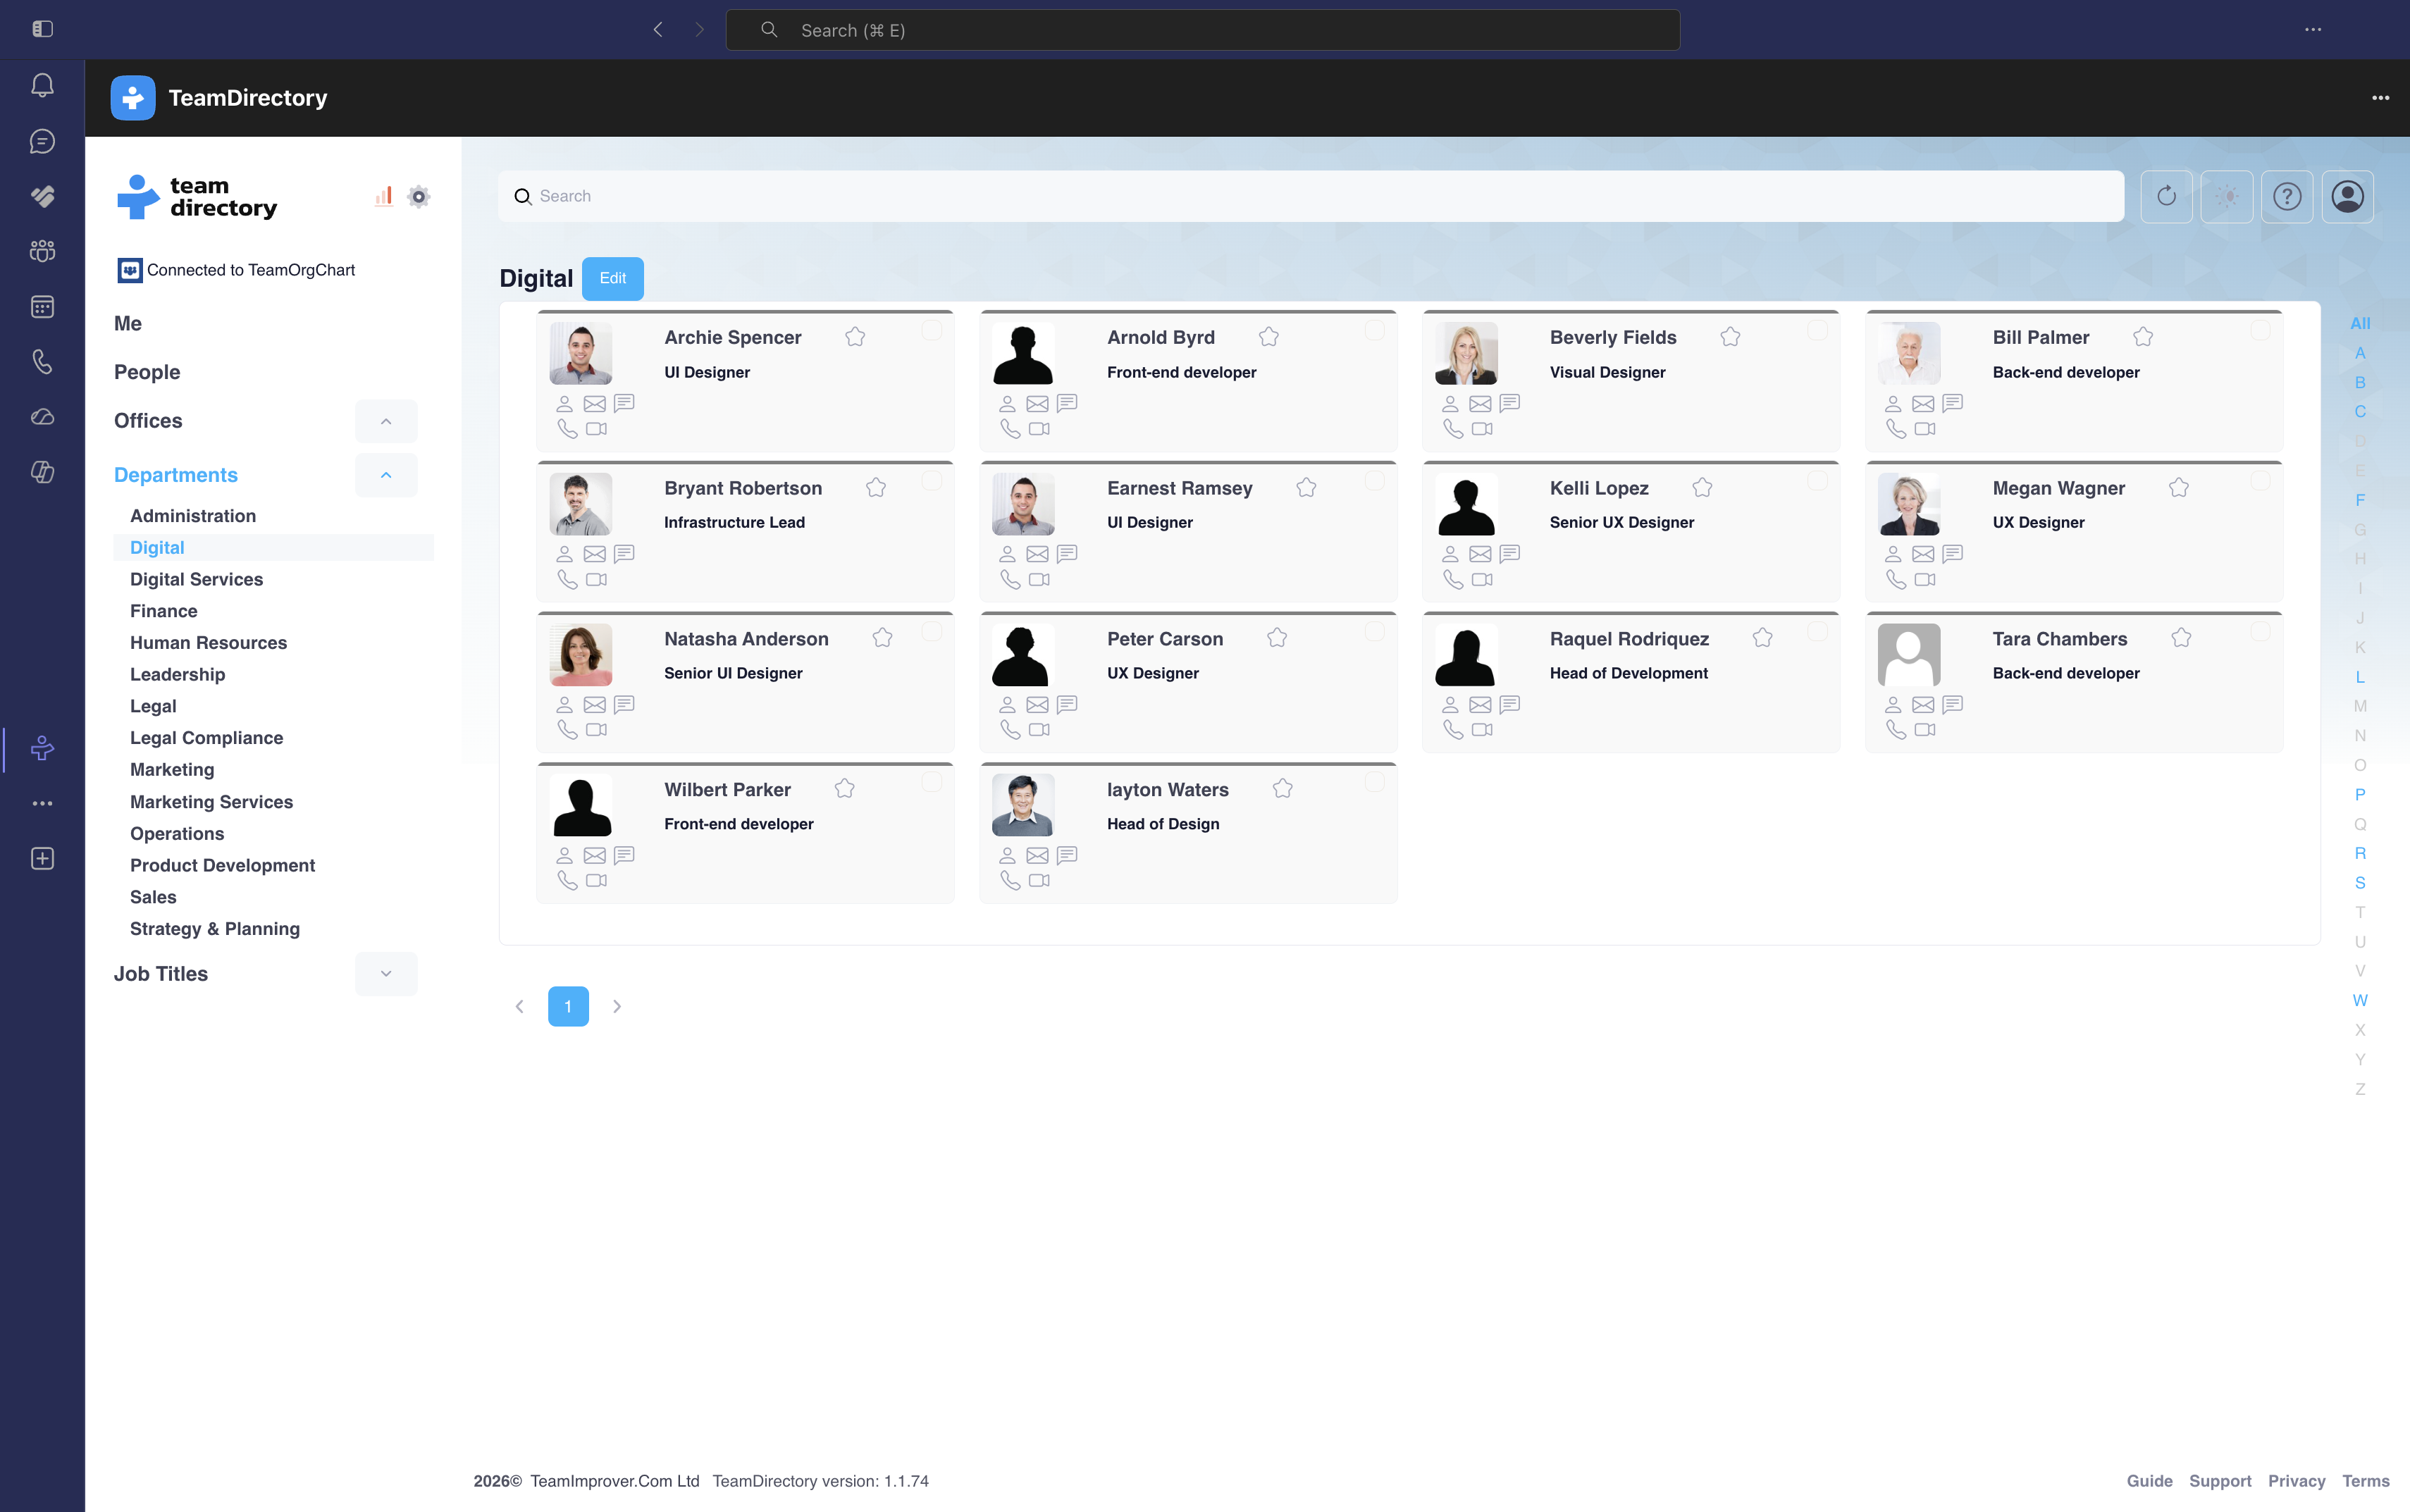
Categories
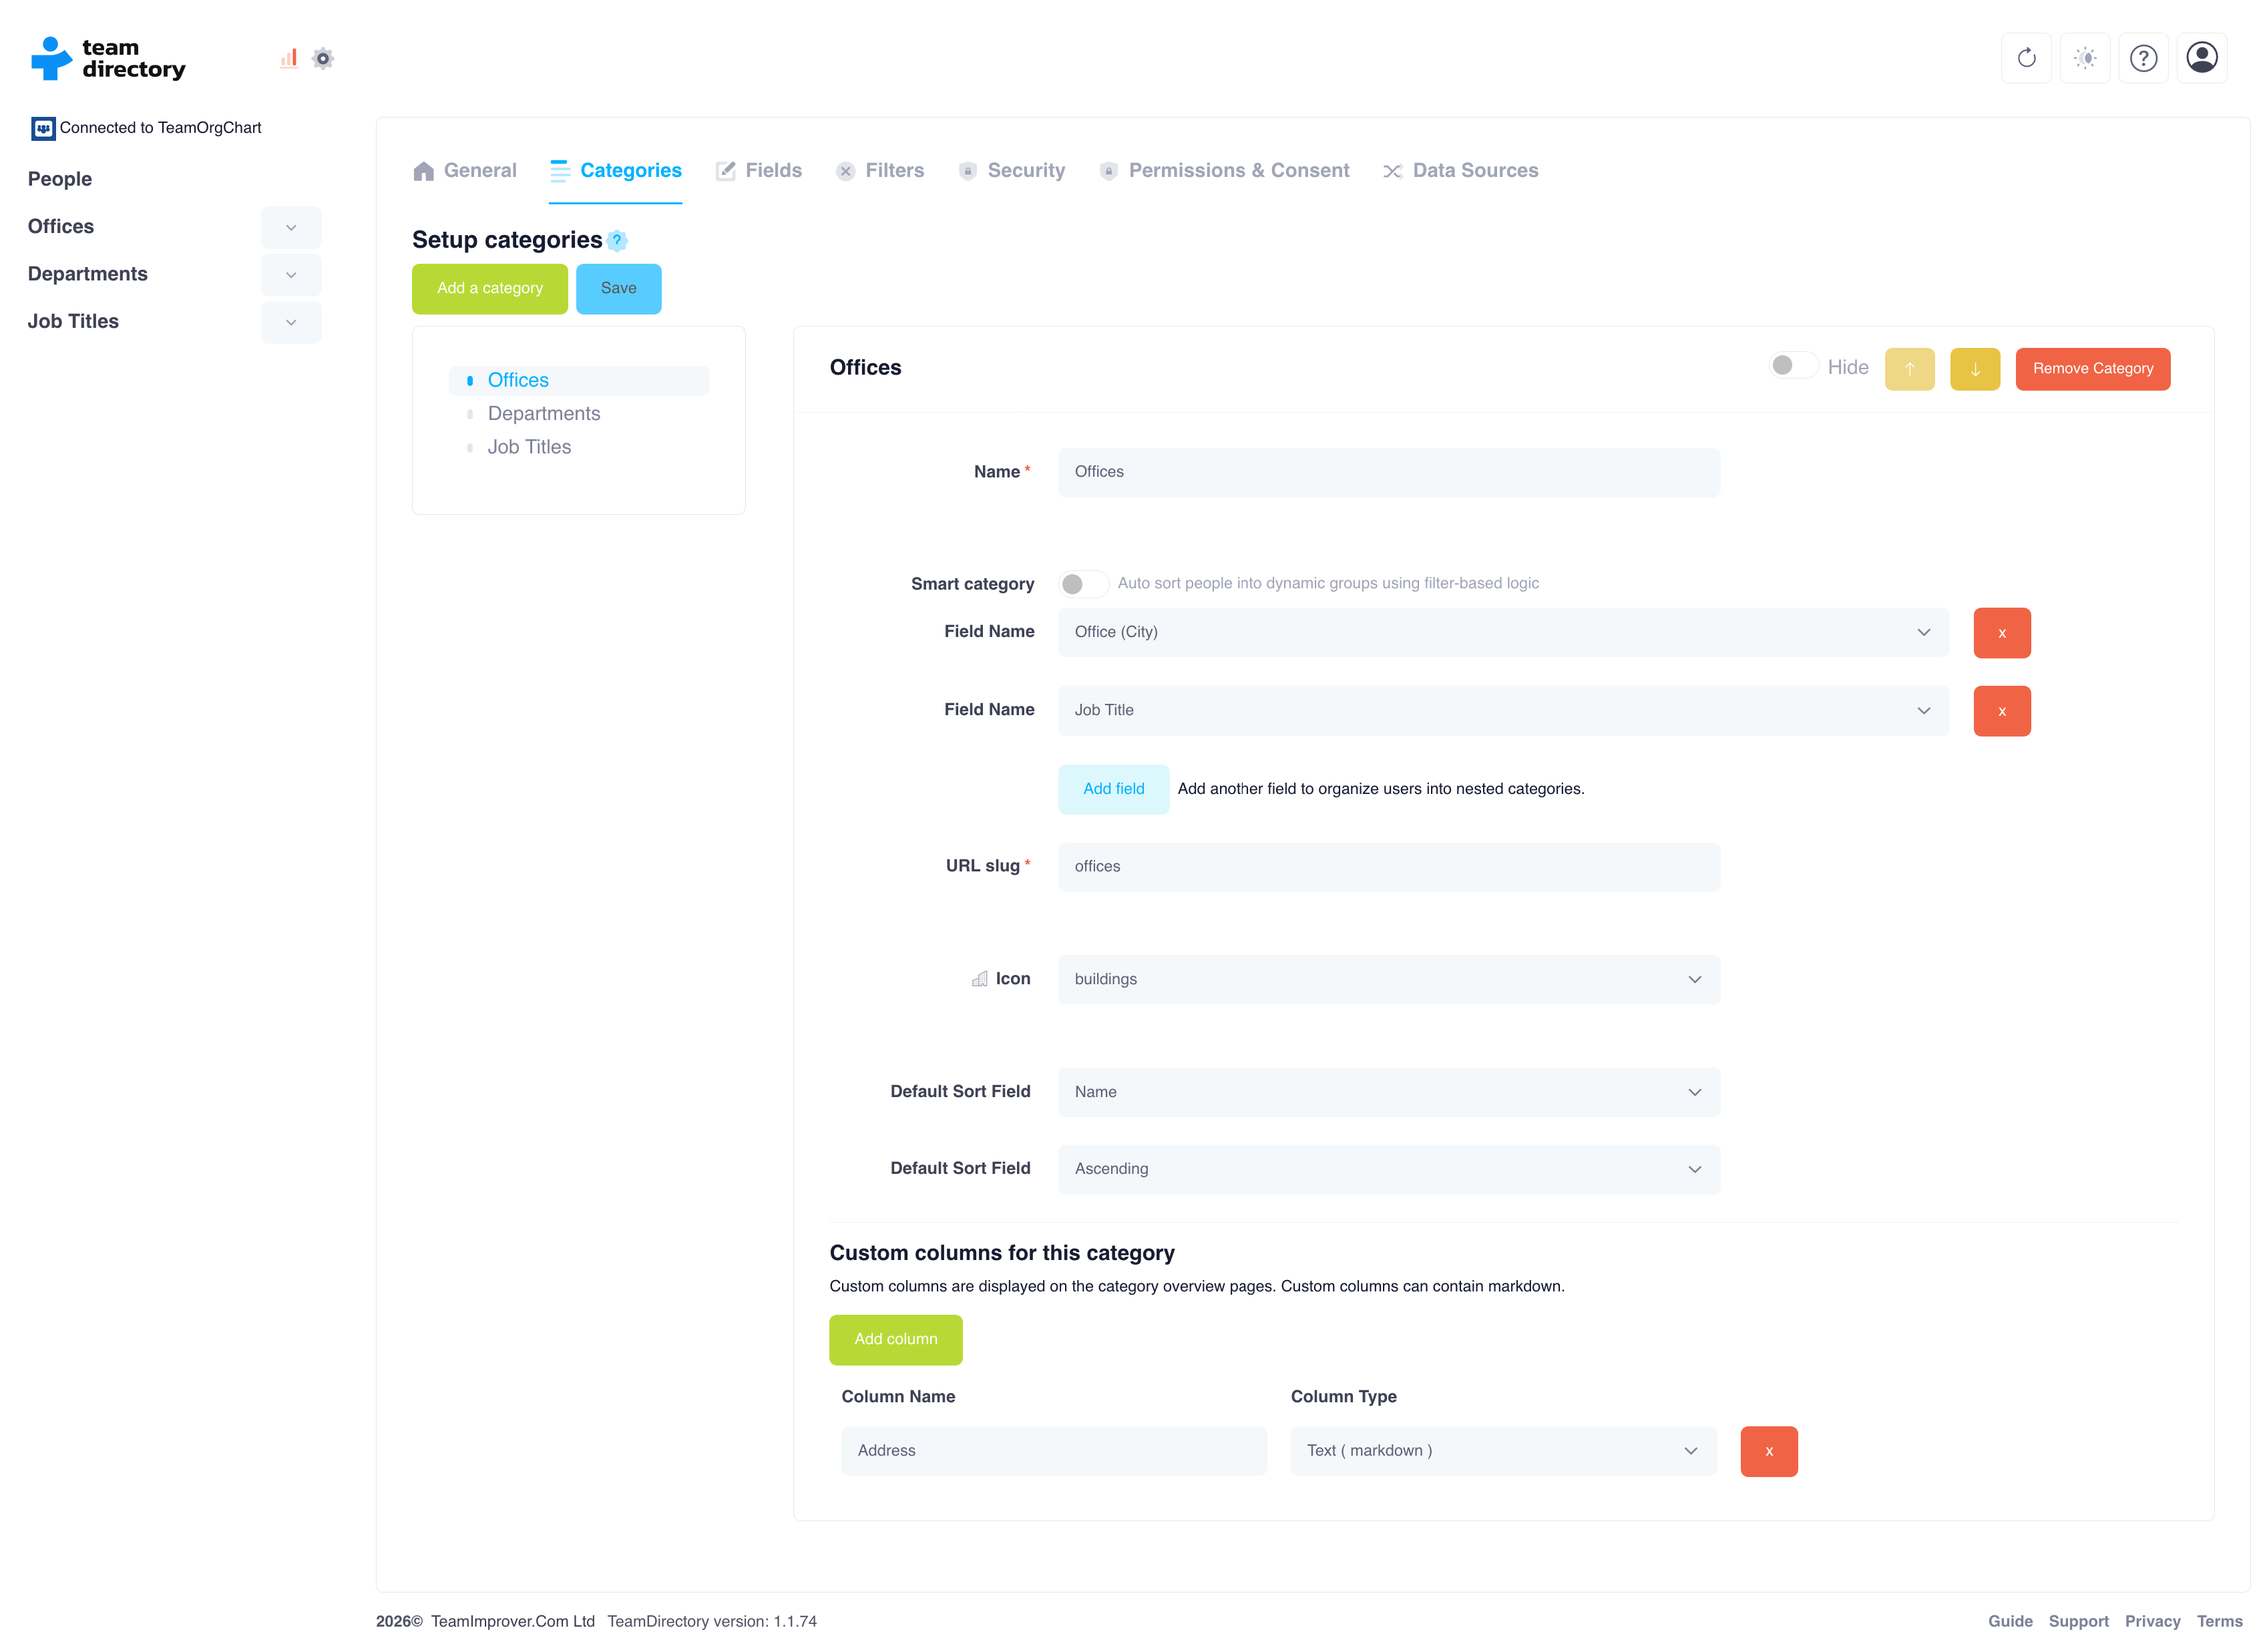
Create a custom category
To create or manage categories, navigate to the Categories tab within TeamDirectory’s Settings.
This page lists all current categories within your organization. You can modify or reorder existing categories by selecting them from the list.
- At the top of the Categories tab, click the Add a Category button to start creating a new category.
-
A form will appear where you need to enter details for the new category:
- Category name: Choose a name that clearly identifies the category.
- Entra ID field: Select the relevant field from Microsoft Entra ID that will serve as the basis for the category.
- URL slug: Set a unique URL slug for the category. This will form part of the URL for the category’s page.
- Icon: Optionally choose an icon to visually represent the category in the interface.
- Once you have completed the form, click Save. The new category will be created, and team members will automatically be placed into the appropriate category based on the selected Entra ID field.
Create a smart category
Unlike basic, single-attribute categories, Smart Categories let you apply dynamic, logic-based filters that reflect your unique organizational structure.
Whether you need to identify managers in a specific region or team leads with specialist expertise, Smart Categories give you the flexibility to segment your directory in meaningful, actionable ways.
- Navigate to the Categories tab within TeamDirectory’s Settings.
- Add a new category.
- Enter a name for your new category.
- Enable Smart Category.
-
Add an AND or OR logic expression using the + button or the Add an Expression button, then define your rule using:
- Field name, for example Department
- Operator, for example Equals or Contains
- Value, for example Marketing
- Click Save.
Create a nested category
Nested categories extend TeamDirectory’s core Categories feature, adding structure, flexibility, and clarity to how you organize and navigate your data.
Instead of stopping at one top-level grouping, such as Department or Location, you can add as many levels as you need. This gives you deeper visibility into your organization. For example, you could create structures such as:
- Country → City → Department
- Division → Project → Contract Type
- Sub Brand → Team → Role
This multi-level categorization makes your directory more intuitive and helps teams discover colleagues, expertise, and structures in a more meaningful way.
- Navigate to the Categories page in TeamDirectory’s Settings.
- Click Add a Category, or select an existing category.
- Set your top-level field name. This is your primary category, such as Country or Department.
- Click Add Field, then select what you want the next category level to be sorted by, such as City or Project.
- Fill in the rest of the category details as usual and click Save.
You can also integrate Microsoft Entra ID extension attributes, allowing you to align categories directly with your organization’s directory data.
Navigate your directory
Search
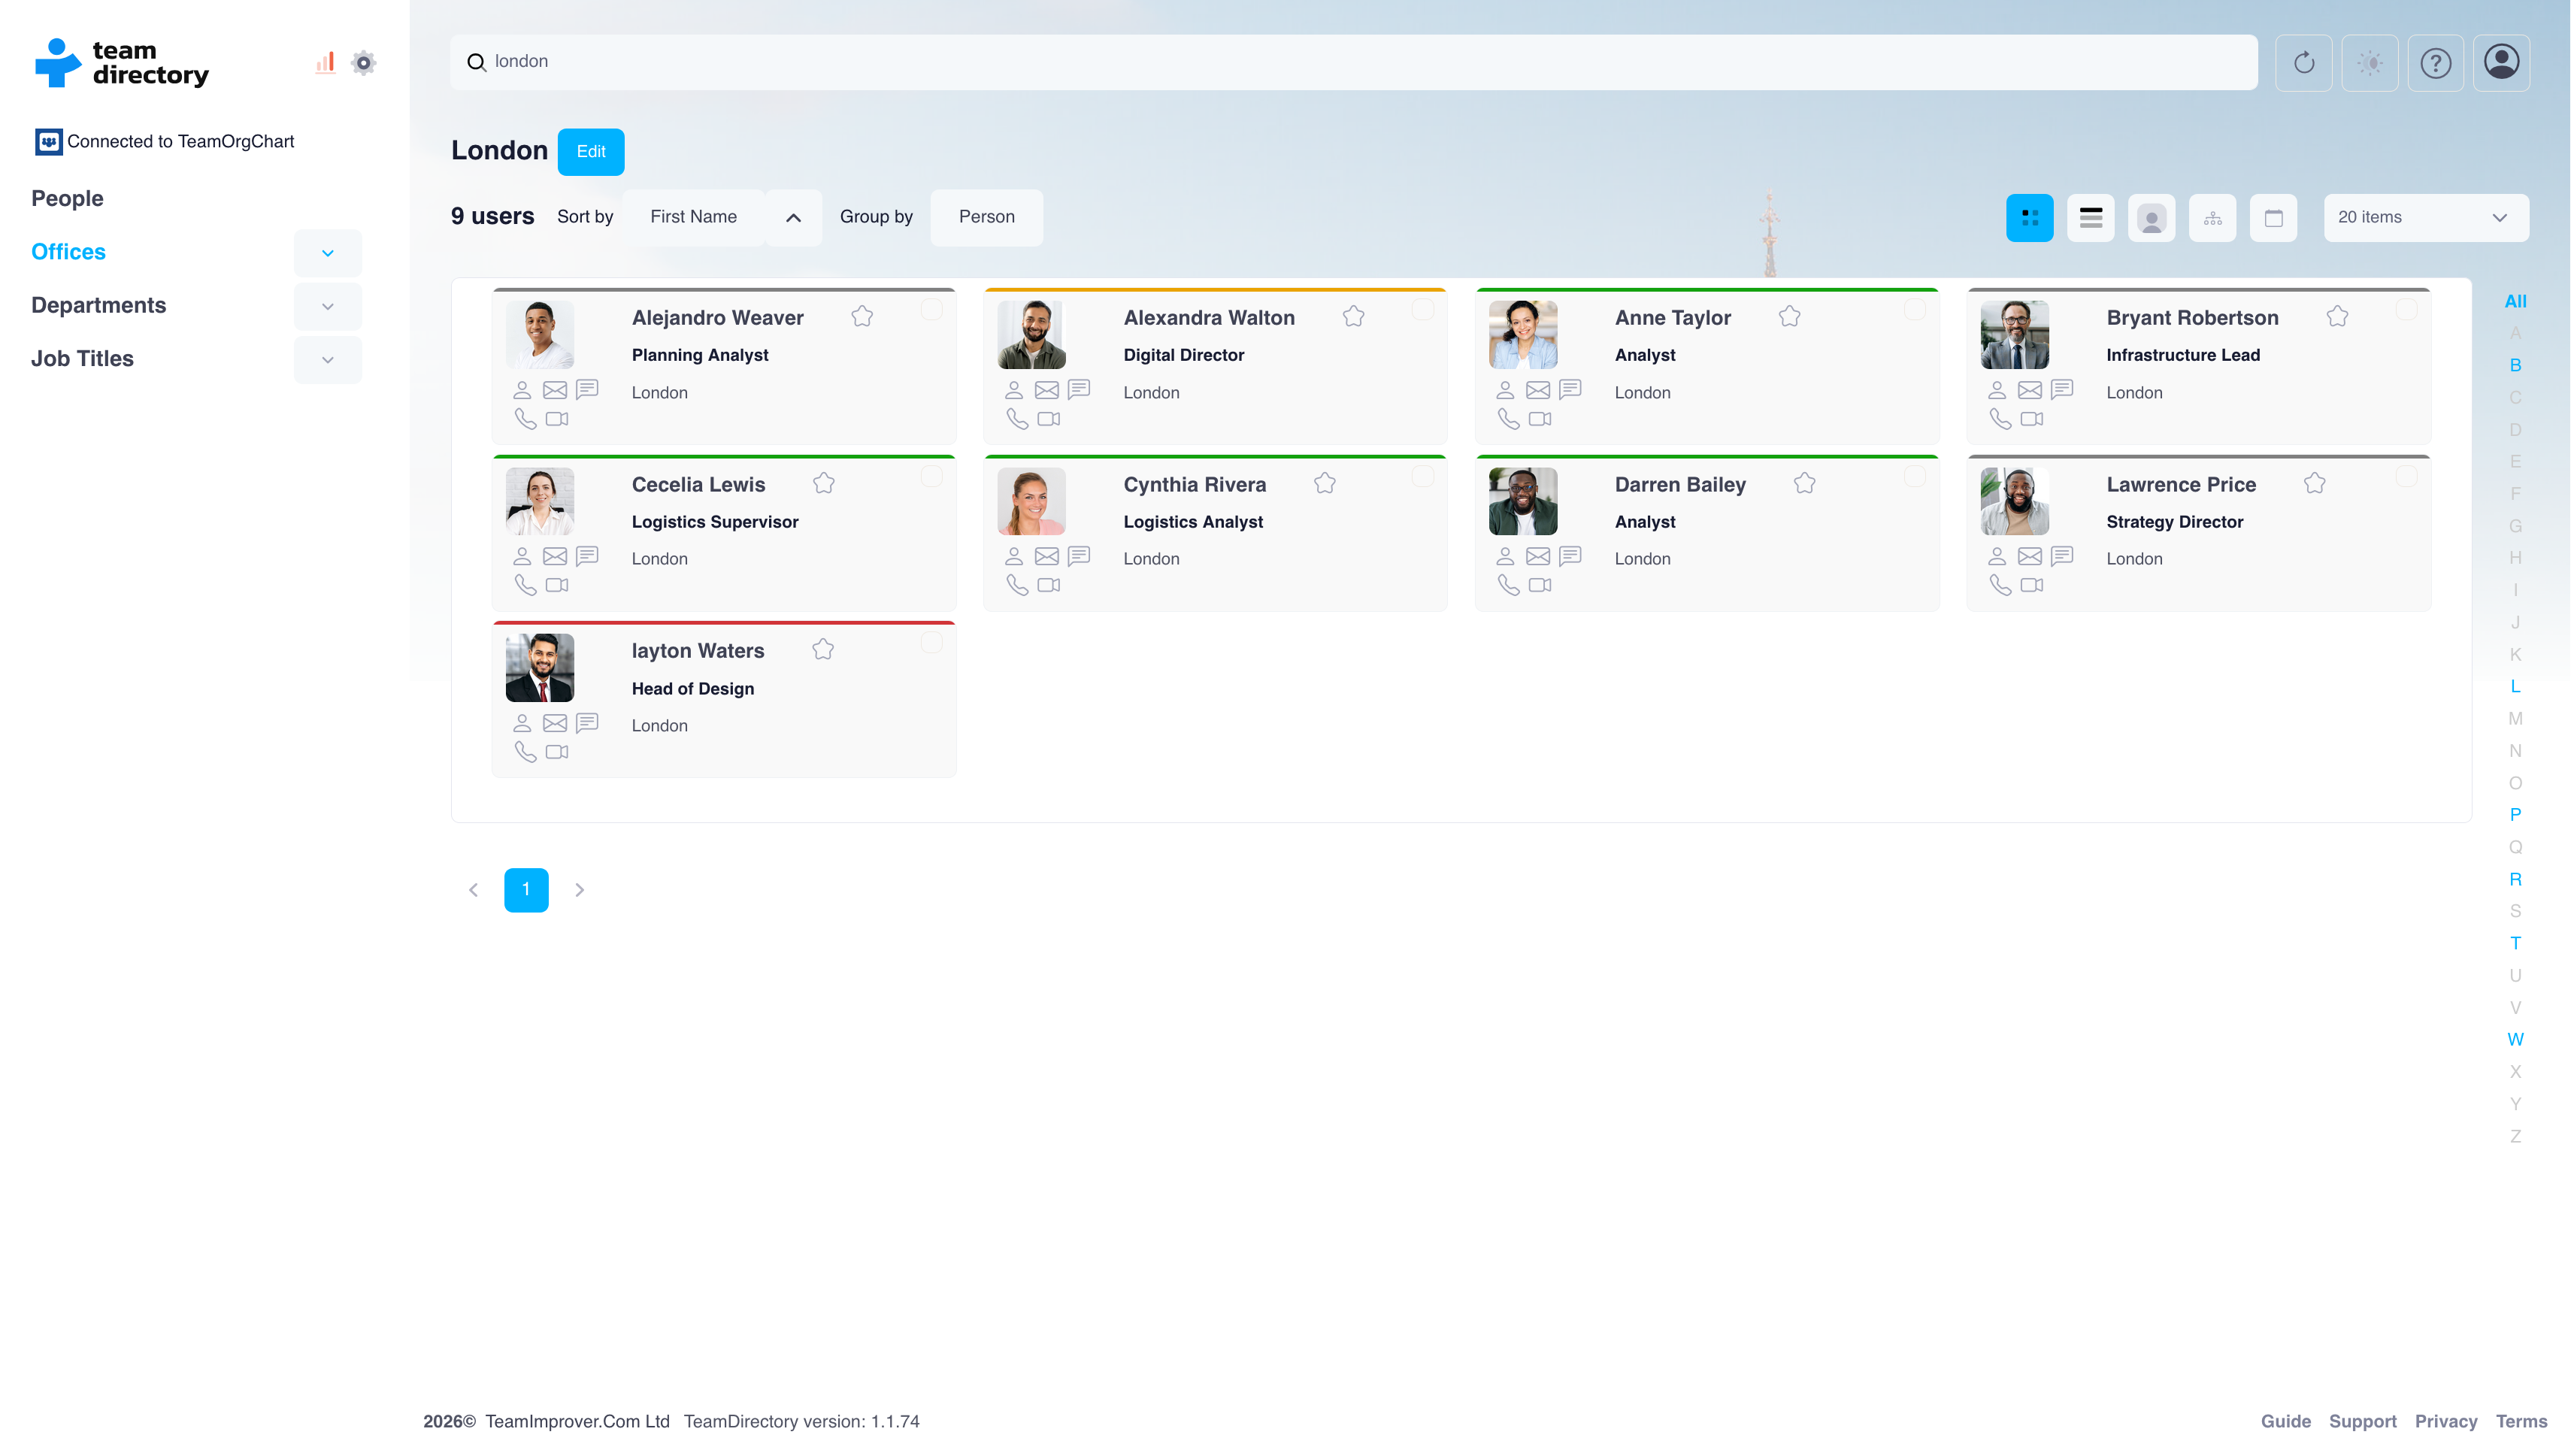
- Start typing in the search bar at the top of the screen. You can enter names, job titles, department names, office locations, or any keyword relevant to the organization.
- As you type, TeamDirectory will dynamically display matching results in real time. You will see a list of team members, offices, job titles, or departments related to the keyword.
- Once you find the person, office, or department you are looking for, click the result to view more details. If it’s a person, the Information Window will appear, showing their contact details, job title, department, and other relevant information.
If too many results appear, you can use the alphabetic filter on the right of the screen to narrow down your search.
Information window
To open the Information Window, click a person from your search results or from a category view, such as office or department. A pop-up will appear, displaying all available information about that person.
Quick actions
- Start a Teams chat: Immediately start a conversation with the person in Microsoft Teams.
- Make a call: Make a direct call, if your system supports it.
- Send an email: Open your default email client to compose a new message.
Create fields and apply filters
The Filters page allows administrators to exclude certain people or groups from appearing in the directory. This gives you the flexibility to tailor the directory to your organization’s needs, such as excluding specific departments or hiding inactive accounts.
Filters work as boolean expressions that evaluate one or more fields within Microsoft Entra ID, excluding people who meet the specified conditions. For example, you could create a filter where Job Title contains Intern or Country equals Germany.
Adding a filter
- On the Filters page within TeamDirectory’s Settings, click the Add New Filter button to start creating a filter.
- Click Add an Expression to define the criteria for the filter.
-
From the Field Name drop-down, select an Entra ID field that you want to filter by, such as Department or Job Title. From the Operator drop-down, choose how you want the field to be evaluated. Operators include options such as:
- Contains: The value must be part of the selected field.
- Equals: The value must exactly match the field.
- You can add additional fields to the same expression. Each field added within the same row will be evaluated using AND logic, meaning all conditions must be true for the filter to apply.
- You can also add additional expressions to your filter. These additional expressions are evaluated using OR logic, meaning if any expression satisfies its conditions, the filter will hide those users.
- Once you have defined the conditions and expressions, click Save to apply the filter. The appropriate users will be excluded from the directory based on the filter criteria.
Choose where information is displayed
View options

- Grid View: The information displayed when viewing a category in grid format.
- Table View: The information displayed when viewing a category in table format.
- Details View: The information displayed when viewing a person’s details card.
Adding fields to a view
- Navigate to the Fields tab within TeamDirectory’s Settings. From the left-hand side menu, choose the category for which you want to add fields. For example, select People if you want to add fields for individual profiles.
- Click the Add button to create a new field for that view.
- In the field creation form, select the Entra ID field you want to display. This could be any field available in your Entra ID directory, such as Job Title, Office, or Department.
- Once you have selected the field, click Save. The new field will now be included in the selected view type.
Managing administrators
In TeamDirectory, administrators can edit categories, create filters, manage data integrity checks, and perform other administrative tasks. You can manage who has administrator rights on the Security page within TeamDirectory’s Settings.
When you first start a trial of TeamDirectory, all users are given admin rights by default. This allows everyone to manage the directory and explore the administrative features.
Once you add at least one administrator, the system will restrict admin rights to only those designated as administrators.
How to add an administrator
- Navigate to the Security page.
- Use the search box to find the person you want to make an administrator.
- Once you have located the correct person, click the Add button to grant them admin rights.
How to remove an administrator
- Navigate to the Security page.
- Locate the correct person on the list and click the Remove button next to their name.
Checking your data
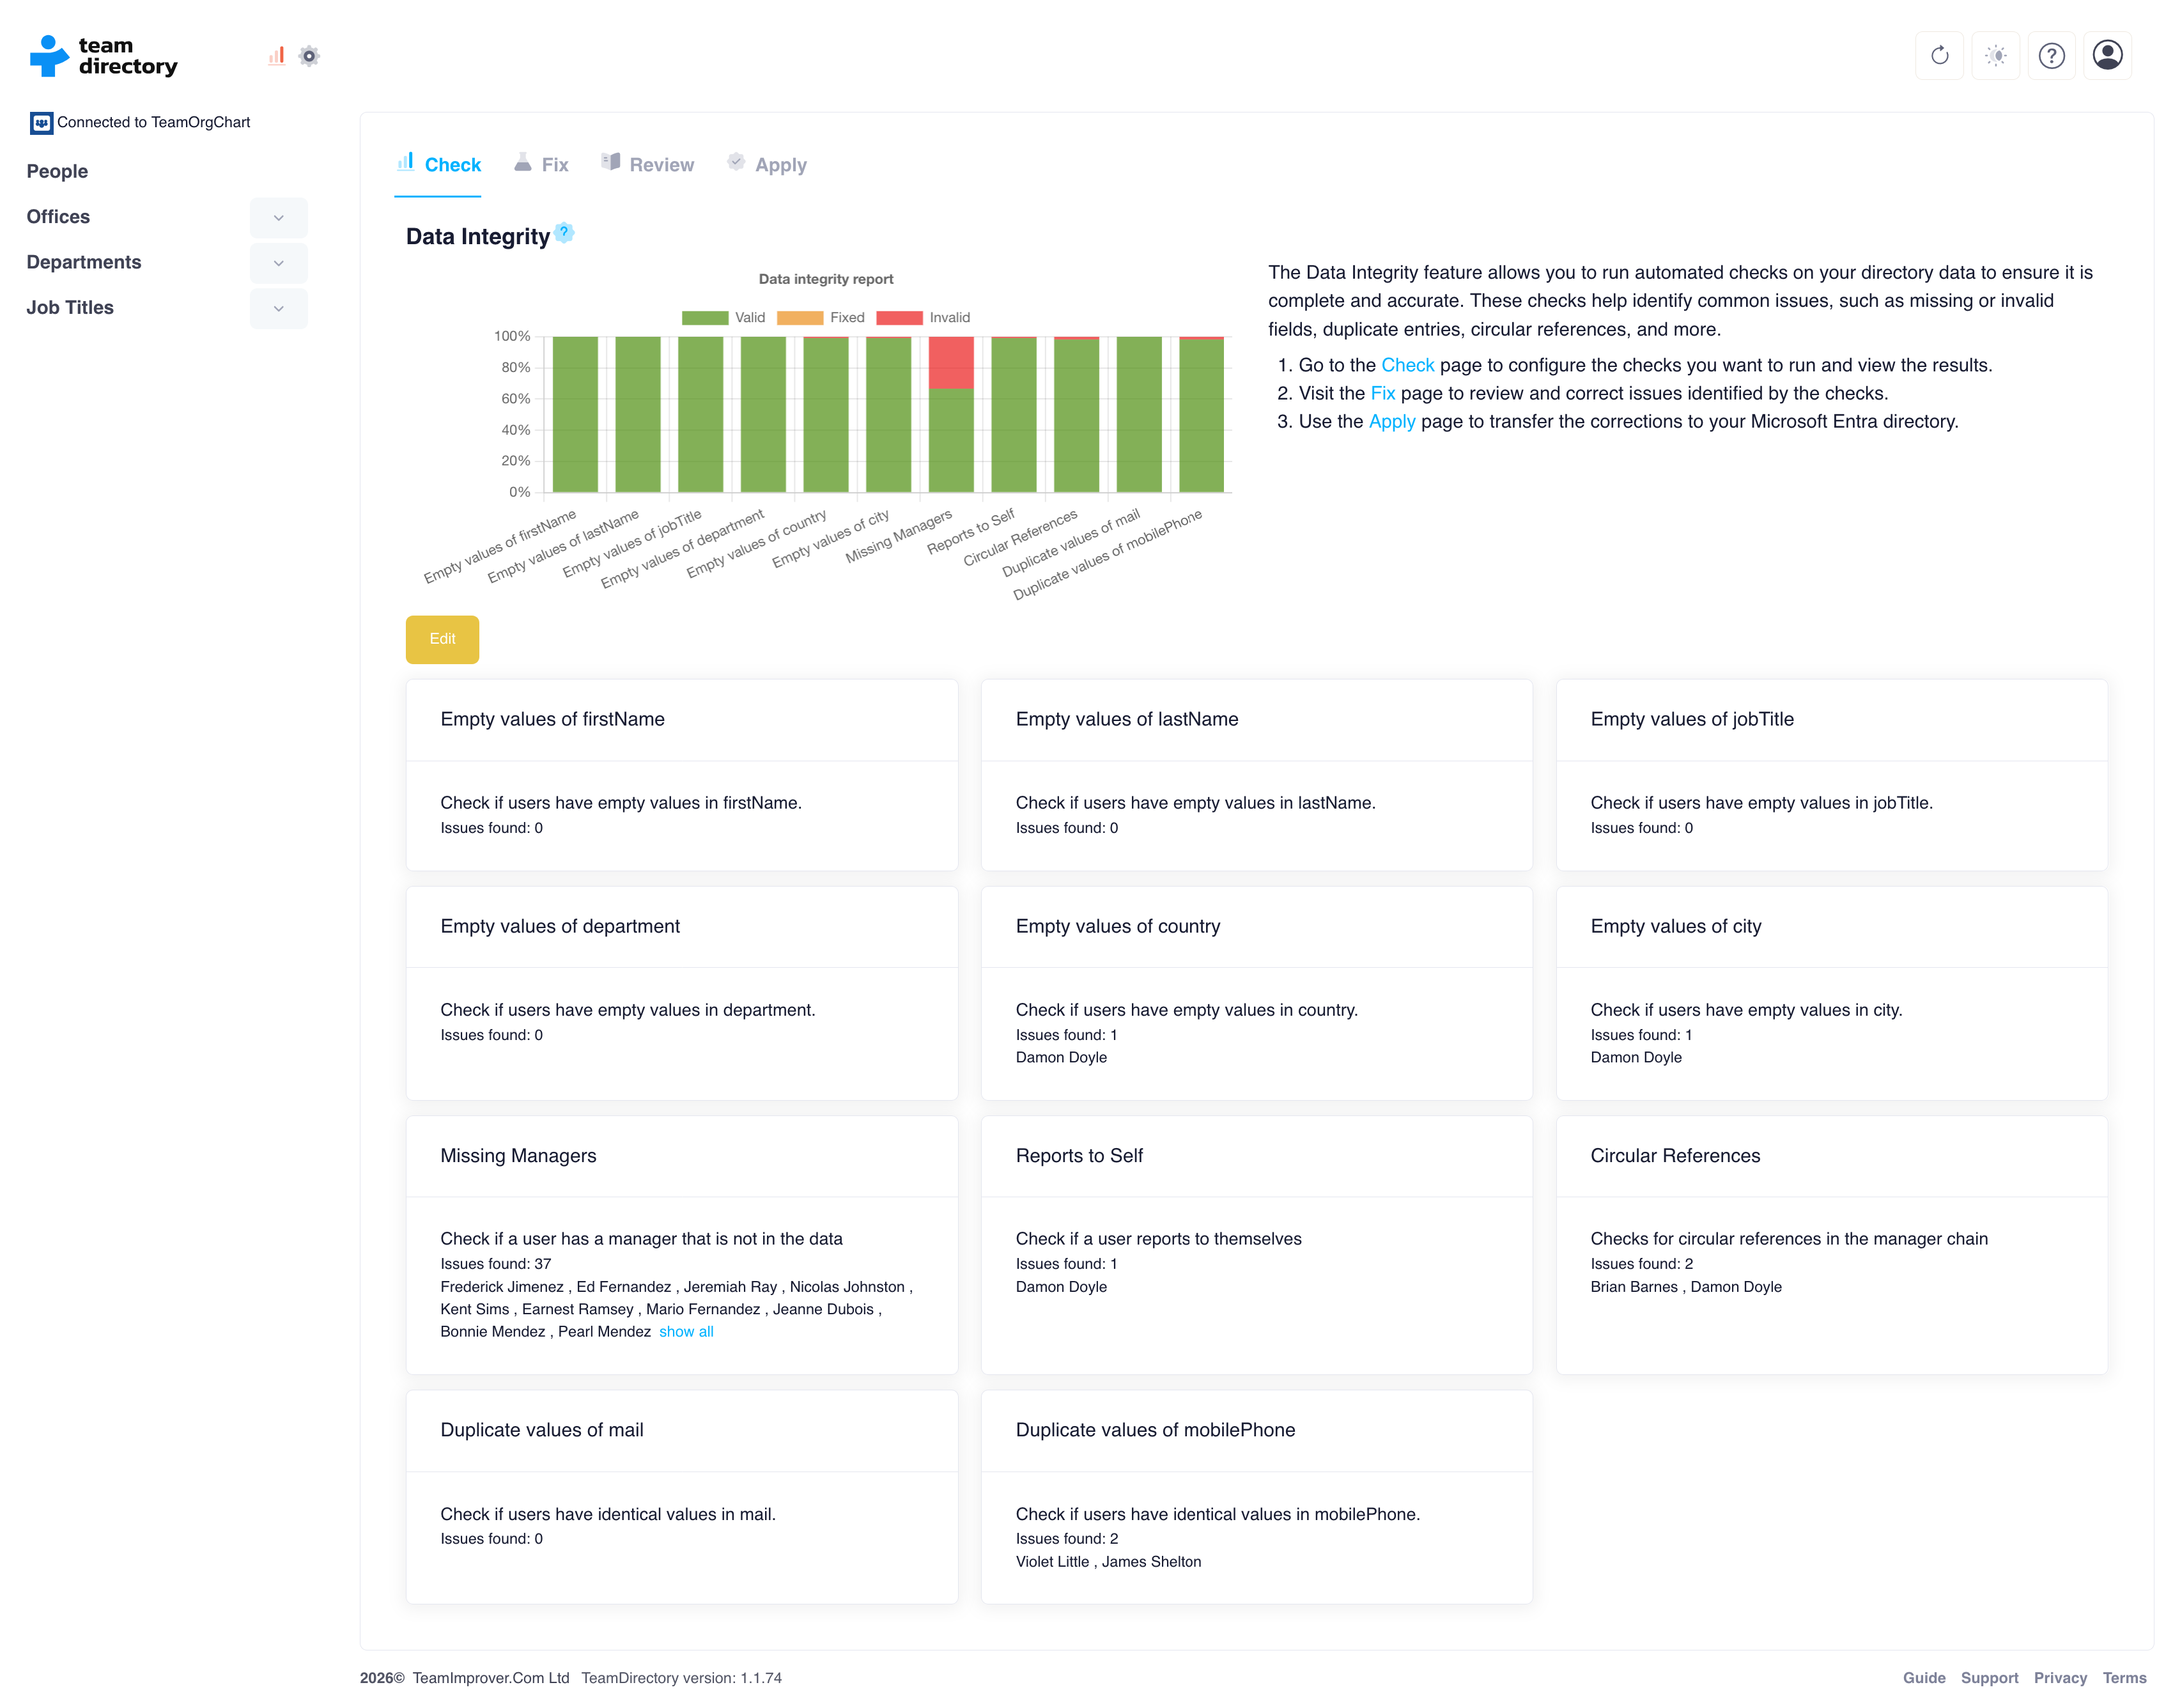
TeamDirectory includes data integrity tools that help administrators identify, review, and correct missing or inaccurate directory data before applying approved changes back to Microsoft Entra ID.
Data integrity checks run automatically when you open the Data Integrity Check page and will re-run if you modify the checks. The system scans the directory data and generates a report highlighting any issues.
The Data Integrity graph provides a visual summary of the integrity status of key fields such as Country, Display Name, and Job Title. Each check is listed below the graph, displaying a summary of the issues found.
Users can review and fix these issues by going through the other steps of the integrity process: Fix, Review, and Apply.
Fix
The Data Integrity Fix page lists all the integrity checks that have been run and shows the number of users who failed each check. There are two main views for reviewing failed checks:
- By Integrity Check: This view lists each integrity check, such as empty values or invalid data, and shows the number of errors found in the directory for each check.
- By User: This view shows individual users and the checks that each person failed. This allows for a user-focused approach to fixing the data.
For each failed check, administrators can click the Details button to view more specific information about the failed data. In the Details view, administrators can manually correct invalid or missing values.
Examples of data fixes include:
- Incorrect department: A user has an incorrect department listed, such as IT. The administrator can update the department name to the correct term, such as Information Technology Services.
- Spelling mistake: A city field contains a spelling mistake, such as Lonon instead of London. The administrator can fix the value directly in the Details section.
These changes are saved in TeamDirectory and override the original values when displaying users. Once all necessary fixes have been made, the administrator can proceed to the Review and Apply stages to finalize the corrections and sync the data with Microsoft Entra ID.
Review
When a user who is not an administrator submits a request to change their profile data, or when changes are made during the Fix process, these modifications appear on the Review page.
Administrators can review each proposed change before it is applied to Microsoft Entra ID.
The Review page displays the following information:
- User: The person who requested or is affected by the change.
- Field: The specific field the user wants to modify, such as Job Title or Office Location.
- Current value: The existing value in Microsoft Entra ID.
- Requested change: The value the user wants to change it to.
- Author: The person who requested the change or made the modification.
Approving or rejecting changes
Administrators can review each requested change and choose one of the following actions:
- Approve a change: Click the checkmark to approve the proposed update.
- Reject a change: Click the X to reject the proposed update.
- Delete a proposed change: Use the trash icon to remove the proposed change from the review list.
Administrators can also approve all changes in bulk by clicking the Approve All button. This is useful when all listed modifications have been reviewed and are correct.
Once the changes have been reviewed, administrators can proceed to the Apply step to write the approved changes back to Microsoft Entra ID.
Profile changes for non-admins
If enabled, users who are not administrators can modify their own profile data directly within TeamDirectory from their Profile page.
When a non-admin user submits a change request, the change is added to the change list for review by an administrator.
The Review page shows the current value from Microsoft Entra ID and the requested value submitted by the user.
The administrator can then approve, reject, or delete the modification, ensuring that all changes are reviewed for accuracy before being applied.
This system allows users to keep their information up to date while maintaining administrative oversight for critical directory data.
Apply
If TeamDirectory has been granted the appropriate scopes and the administrator has the necessary Azure role, such as User Administrator, changes can be applied directly to Microsoft Entra ID.
This allows directory data to be updated in real time within your organization’s Microsoft ecosystem.
Directly apply changes to Microsoft Entra ID
Administrators can apply approved changes directly from TeamDirectory to Microsoft Entra ID.
The Apply Selected Changes button allows administrators to apply only the selected changes in the review list.
Fix manually with a PowerShell script
If you do not want TeamDirectory to make changes directly, the Fix Manually option generates a PowerShell script containing the commands needed to update the directory.
This script can be executed by someone with the appropriate permissions, ensuring that changes are made in a controlled and secure manner.
The PowerShell script uses Microsoft Graph PowerShell and generates the required commands to make the changes within Microsoft Entra ID through Microsoft Graph.
Download changes as CSV
For customers who rely on a different back-office system as the source of truth, changes can be exported as a CSV file.
This file can be used internally to update your systems. Once Microsoft Entra ID is updated by the customer, the changes will flow back into TeamDirectory.
This option provides flexibility for organizations with complex data management workflows.
The Include All Directory Users checkbox allows you to export the full directory or only users with changed values.
Configuring checks
Administrators can add, amend, or delete checks based on the fields they want to validate. Common checks include verifying fields such as Country, Job Title, Manager ID, and City.
Each check can be customized to suit the organization’s needs, ensuring that all required data is properly validated.
Use the Edit button to enable editing or create a new check.